
This TypeScript tutorial will cover how we can use module augmentation to solve any type errors you might encounter when working with external libraries. When you get stuck, use module augmentation to tweak the modules that you can’t access otherwise.
Declaration merging in TypeScript
Before we dive into module augmentation, let’s briefly cover how declaration merging works in TypeScript since they follow the same base principle.
TypeScript uses declaration merging to combine multiple types into a single, merged declaration, provided those types have the same name.
You can use TypeScript to combine a wide range of types, such as interfaces with each other, enums with enums, namespaces with namespaces, and so on. The exception is class merging, which is not allowed.
Let’s briefly cover an example:
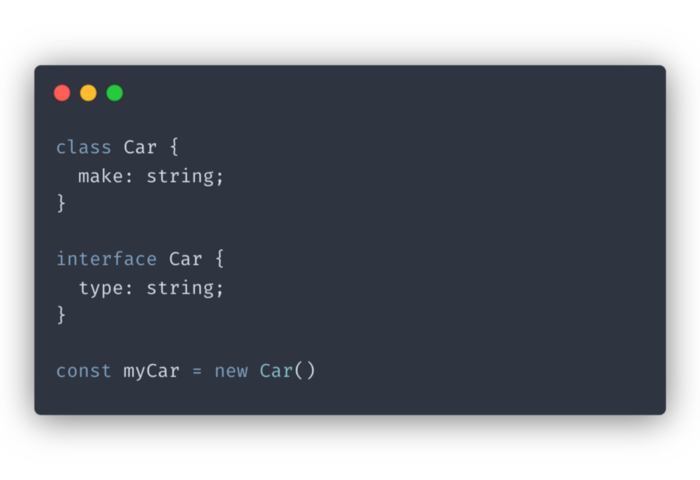
The code above defines a Car class with a make property and a Car interface with a type property. We then create an instance of Car and assign it to the myCar constant. As a result, myCar will contain both make and type properties.
Now, what if we tried adding a method declaration to the interface?
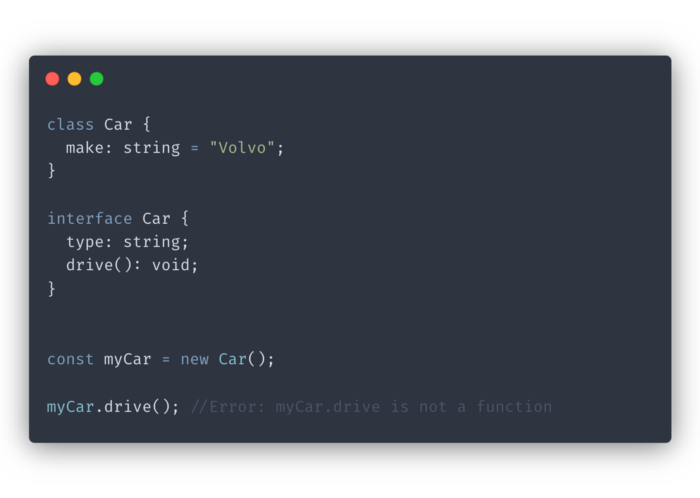
As you can see, we would get an error since we don’t have the actual implementation of the drive method. However, we can add one using the Car prototype:
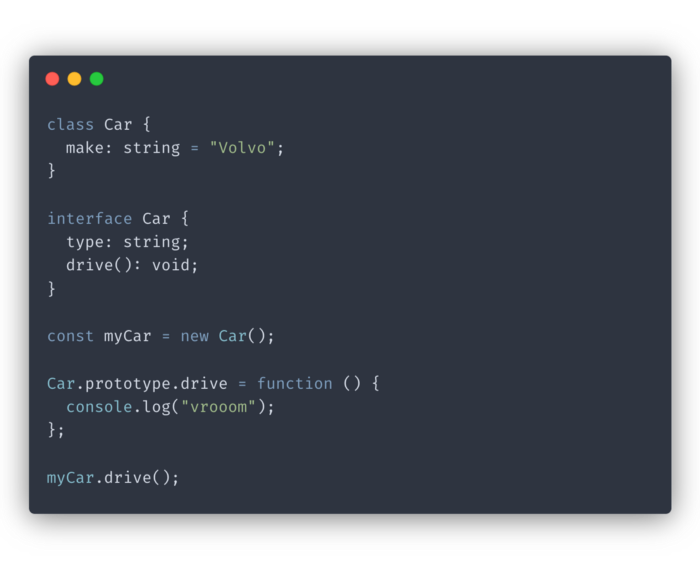
You might think “Why not create a class with the same name and have them both initialize?” But remember, TypeScript doesn’t normally allow you to merge classes. There is however a workaround you can implement with mixins , but that’s outside of the scope of this post.
Now calling drive on our method on our Car instance will work, and we have successfully merged our class and interface!
Module augmentation
Now that we know how declaration merging works in TypeScript, let’s see how module augmentation can help us extend external modules.
We do this by creating a new module that imports the modules we want to augment, enhances them with custom functionality, and then exports them.
Let’s take a look at another example.
First, we’ll create acar.ts module:
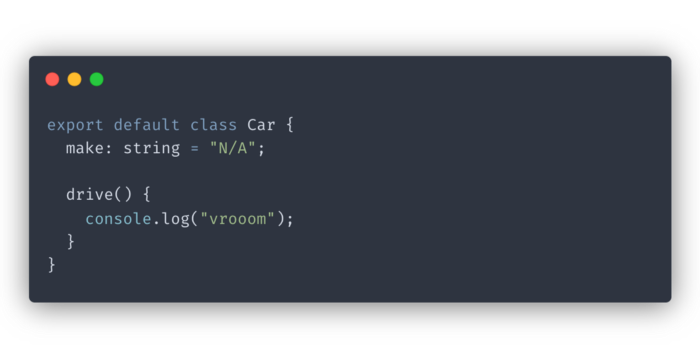
Now let’s create the augmented.ts module that will augment car.ts:
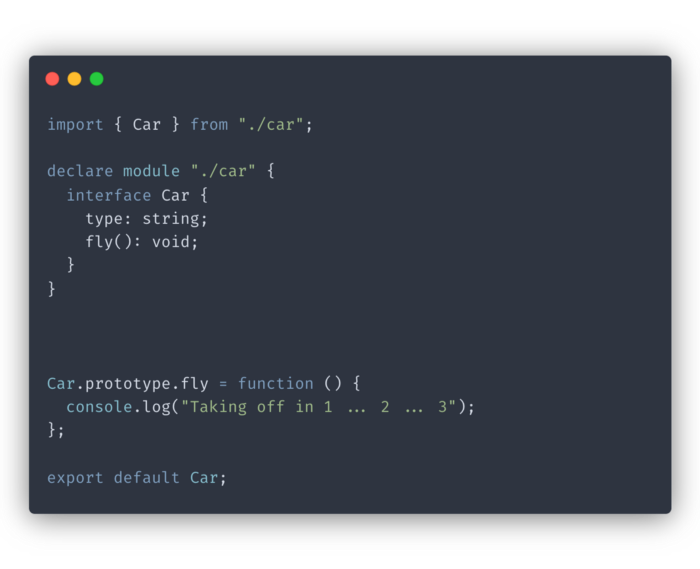
The code above will import the TypeScript file we want to augment and create an interface with the same name as our class. We declare a new public interface that adds a fly method. After adding this, we can now call fly on our TypeScript instance.
The code above will also export the TypeScript class after augmenting it. Now we can use the augmented fly method in our Car instances!
Note: You cannot augment default exports, only named ones. The reason is you need to augment an export by its exported name, and default is a reserved word.
Extending third-party modules using global augmentation
Now let’s see how we can use global module augmentation to extend modules from third-party packages.
The global augmentation technique is similar to module augmentation we covered previously and works as follows:
- Check the name of the TypeScript module you want to extend
- Create a corresponding d.ts file
- Augment the module
Let’s try extending react-beatiful-dnd library with our custom type. First, we’ll create react-beautiful-dnd.d.ts file and add the following code:
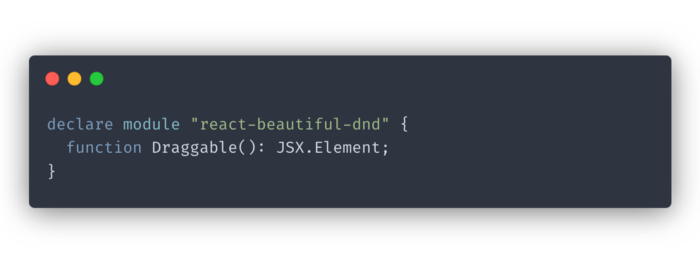
In the code above, we added a type declaration for the Draggable component from react-beautiful-dnd.
And that’s all you really need! Now we can use our type in our app like so:
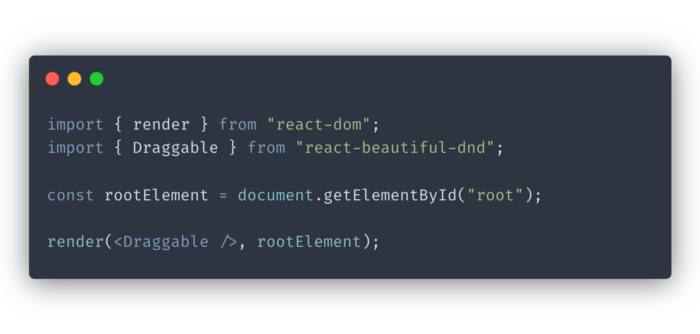
Since we’re using a d.ts file, which TypeScript picks up automagically, we can keep importing our library the same way we would normally.
Conclusion
In this post, we learned the basics of declaration merging in TypeScript with examples. We also covered module augmentation and extending third-party modules using global augmentation to solve any issues you might run into when working with types. I hope you found this post useful!
If you’d like to get more web development, React and TypeScript tips consider following me on Twitter , where I share things as I learn them.
Happy coding!